|
||
Custom Reports:
Date to Date
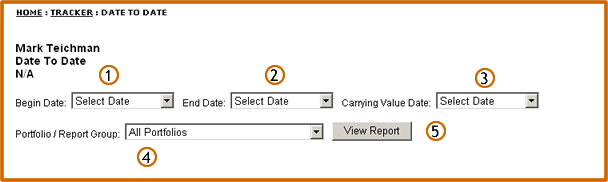
The final step in the Custom Report process is to select the date for the report and the specific portfolio or group to be included on the report |
|
| Using the drop down menu, select the beginning date for your date to date investment report. If the desired date is not in the drop down menu, click the Select New Date option. Enter the desired date in the Date textbox and click the Submit button | |
| Using the drop down menu, select the ending date for your date to date investment report. Click the Select New Date option if the desired ending date is not in drop down list | |
| Using the drop down menu, select the carrying value date for the report. The carrying value date can be on or before the beginning report date. The carrying value date establishes the security value to be used in computing unrealized gains and losses for the report period | |
| From the drop down menu, select the specific portfolio or group to be included in the custom report | |
| Click the View Report button | |
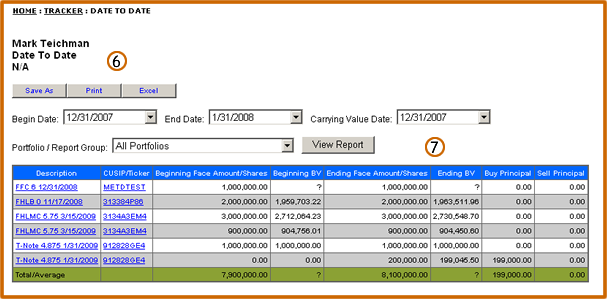
| After the report is displayed, you can use the Save As button to name and save the report in the Reports Center . If this is a report that will be used on a regular basis, the Save As option will eliminate the steps involved in creating the report for subsequent use. To convert the report to a printer friendly format, click the Print button. To open the report in an Excel format, click the Excel button | |
| If you want to change the report dates or the portfolio or group, select the revised dates and/or portfolio from the drop down menu. Click the View Report button |